
This is the second part of my blog series about the Oracle Audit Vault and Database Firewall 20.1 (AVDF). I will demonstrate how to install and configure the Database Firewall 20.1.
Table of Contents
Preparation
Download ISO File
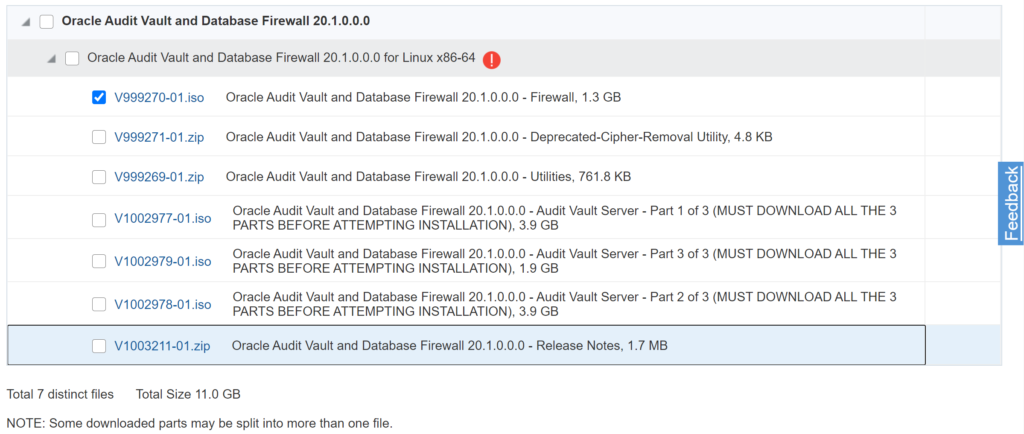
For the installation of the Database Firewall 20.1, the following ISO File has to be downloaded from the Oracle Software Delivery Cloud – search for “Audit Vault and Database Firewall” and download the selected part.
Virtual Machine
The following screenshot shows the configuration of my used Oracle VirtualBox virtual machine. Check the requirements for the Database Firewall installation in the Oracle Audit Vault and Database Firewall 20 Installation Guide.
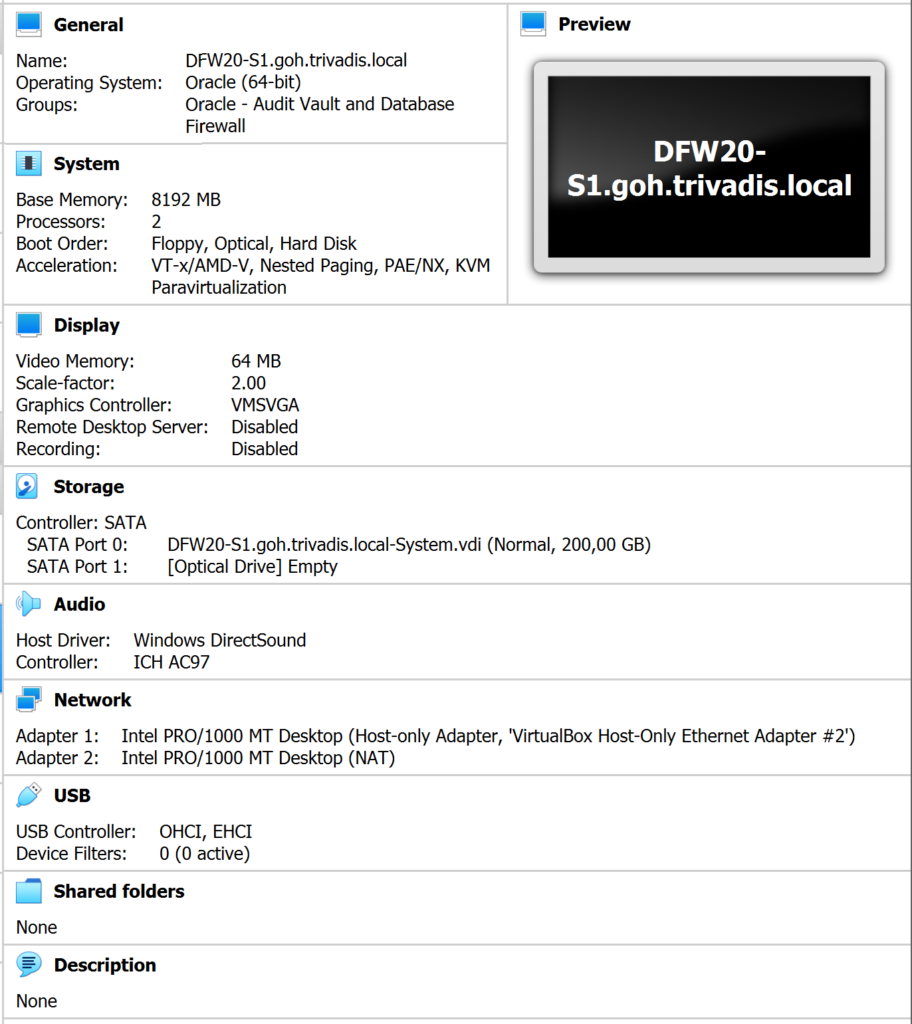
CAUTION: I will configure the Database Firewall in Monitoring/Blocking (Proxy) mode without network separation. Based on the desired deployment type, more network interfaces are required.
Installation
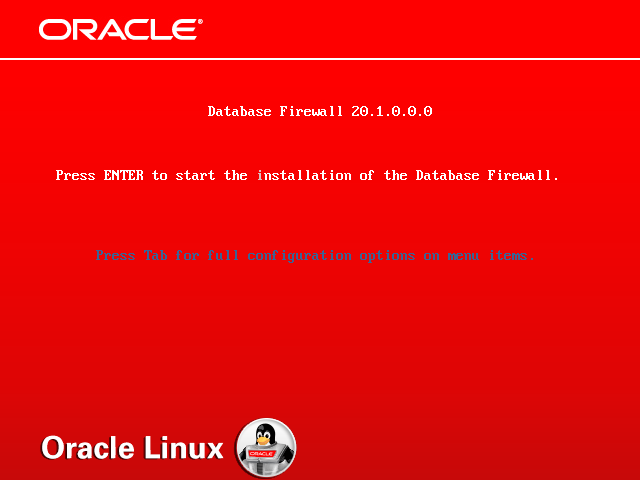
Mount the ISO file and start the virtual machine. The installer of the Database Firewall 20.1.0.0.0 is started. Press ENTER to start the installation.
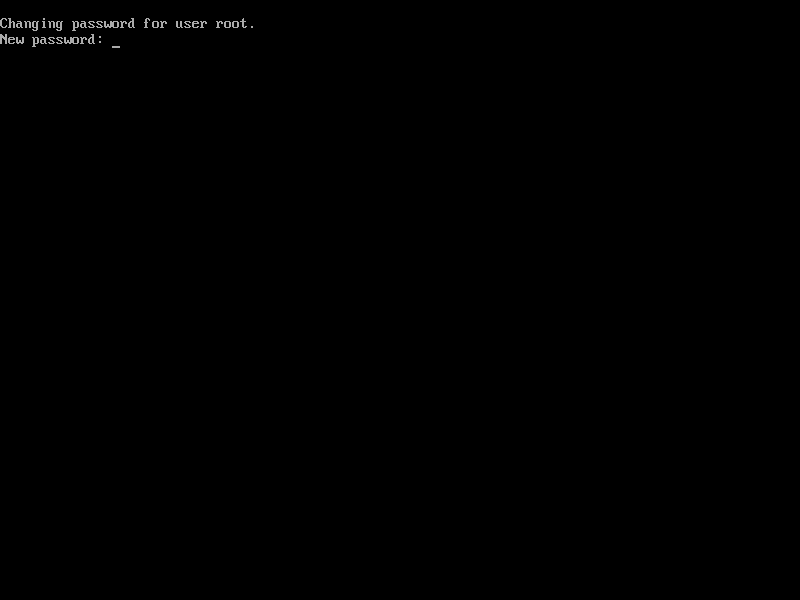
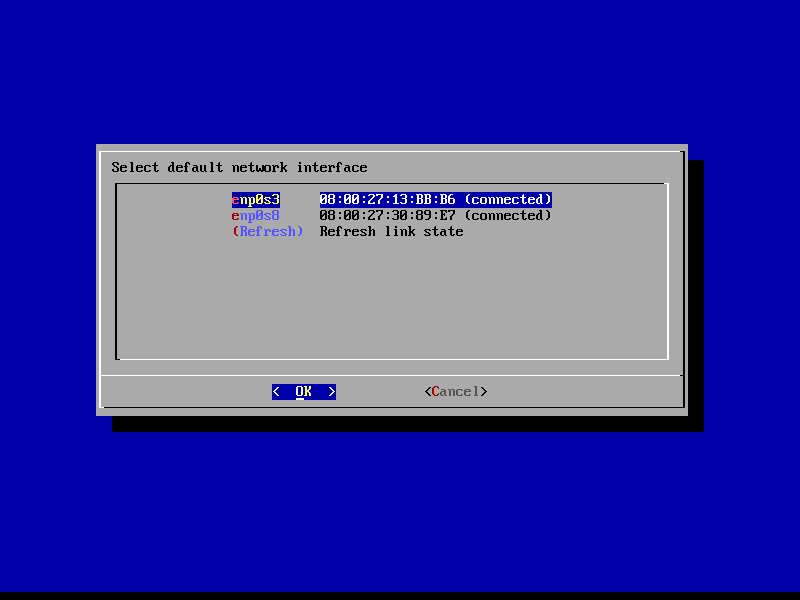
From now on everything is working fully automated. After a while, the installer asks for the root password and the configuration of the network interfaces.
The virtual machine is restarted a few moments later. Ensure that the installation medium is still mounted after the reboot.

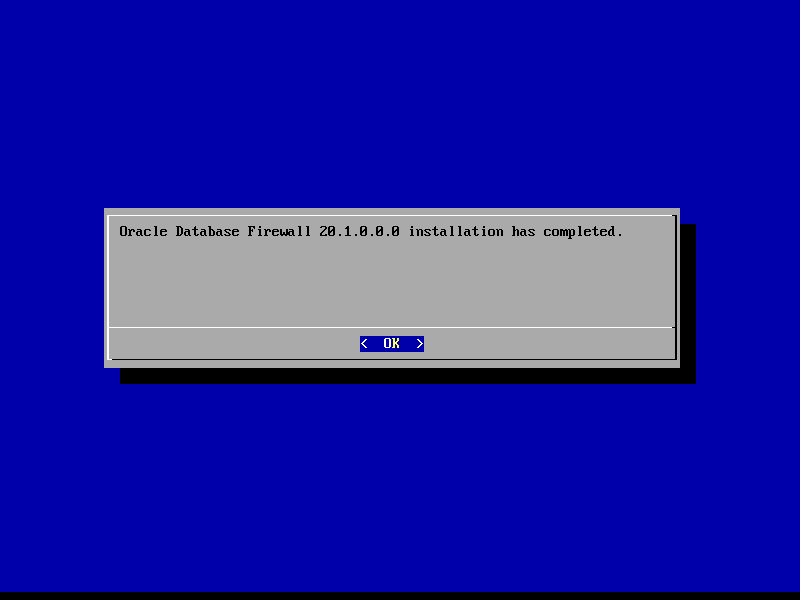
A few moments later, the success of the installation is confirmed. It took 10 minutes in my lab environment to complete the installation.
Configuration
Open Web Console
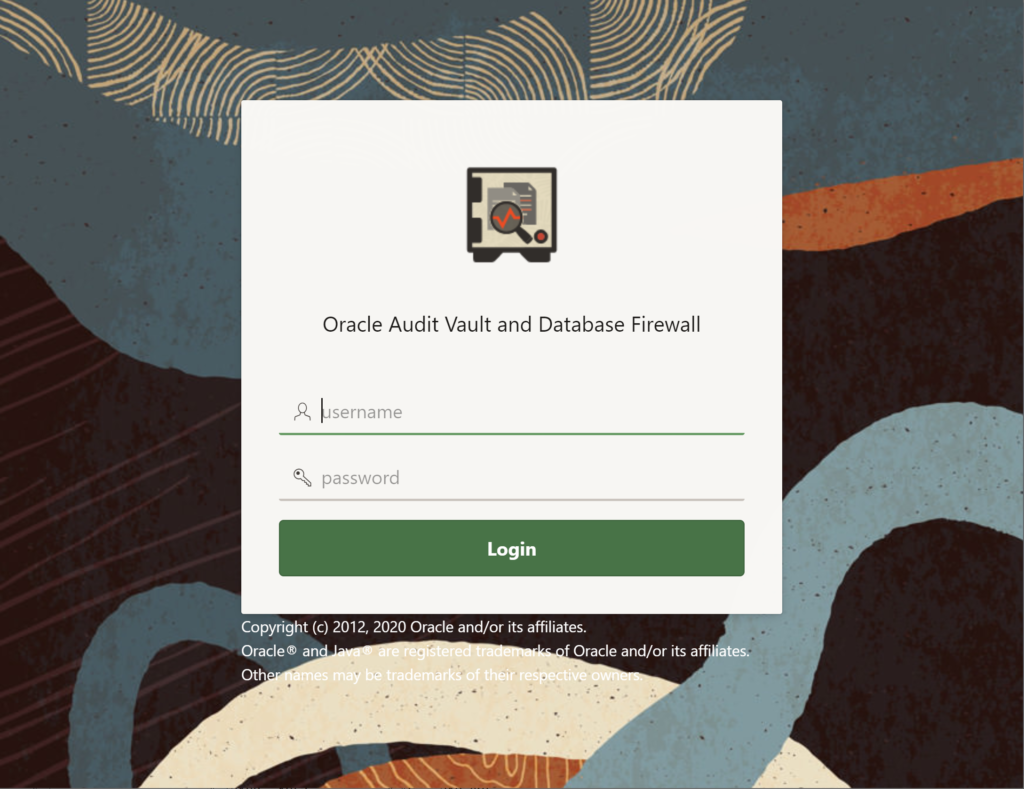
The Database Firewall has no own web console. Everything is handled by the web console of the Audit Vault Server. Navigate to https://<IP/Name of Server> and log in with the Super Administrator (in my case ADMINISTRATOR).
Update Password
To connect to the server via ssh (e.g. PuTTY), set a password for the support user. Log in directly to the Database Firewall with root credentials and execute the following command.
$> passwd support
Configure Certificate
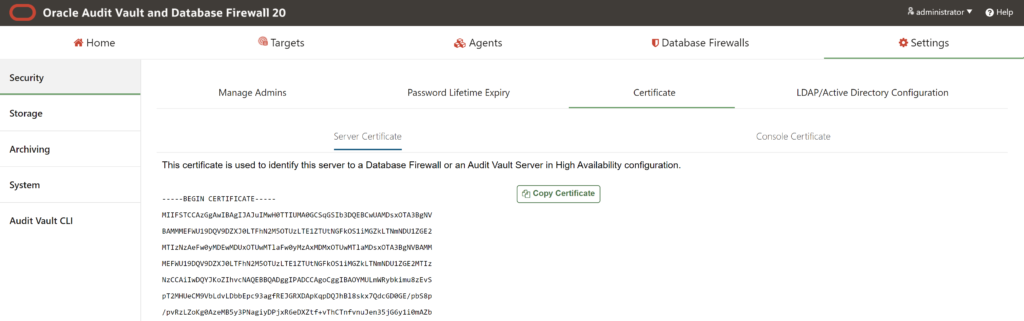
To associate the Database Firewall with the Audit Vault server, the IP address and the certificate of the Audit Vault server are required. In the web console open the Settings tab and navigate to Security and open the Certificate tab. The required certificate is visible in the Server Certificate tab. Copy the certificate and save it as file /tmp/avs_cert.crt on the Database Firewall server.
Log in to the Database Firewall server using the root user and execute the following command. Replace the IP address with the IP of the Audit Vault server.
$> cat /tmp/avs_cert.crt | /opt/avdf/config-utils/bin/config-avs set avs=primary address=192.168.25.150 certificate=-
Notice Success. Settings saved.
Register Database Firewall
Open the Database Firewalls tab and press the button Register. Set a name to identify the Database Firewall and provide the IP address of the server.
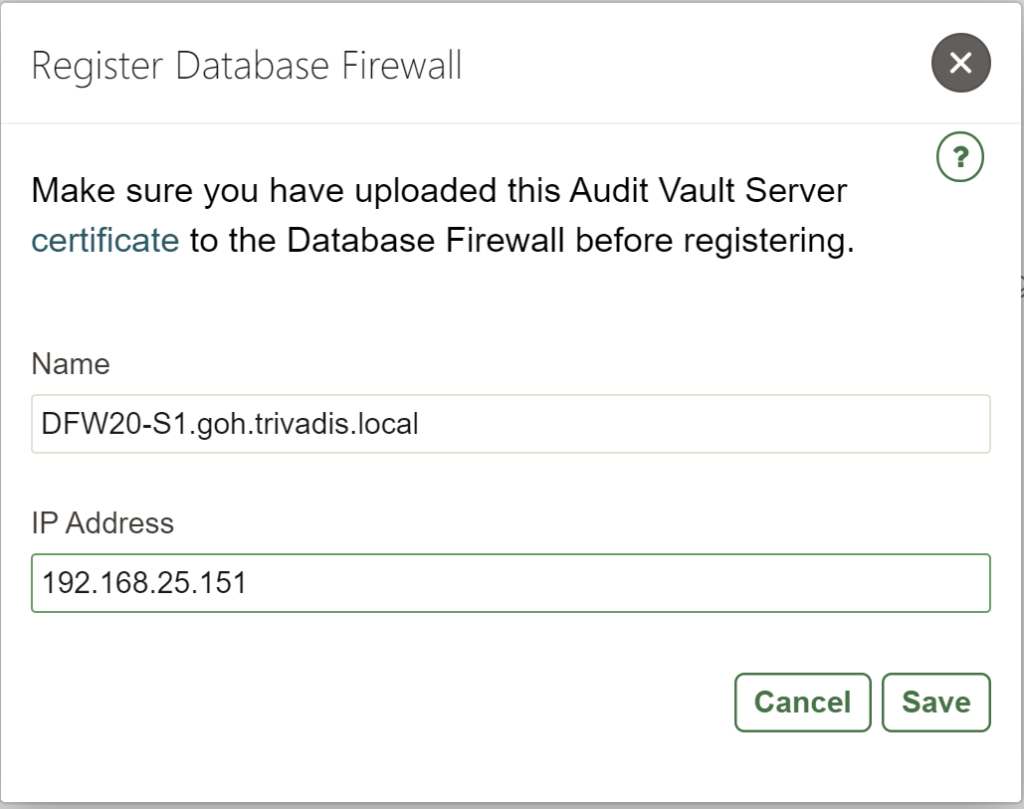
After the registration is complete, the status should be Up.

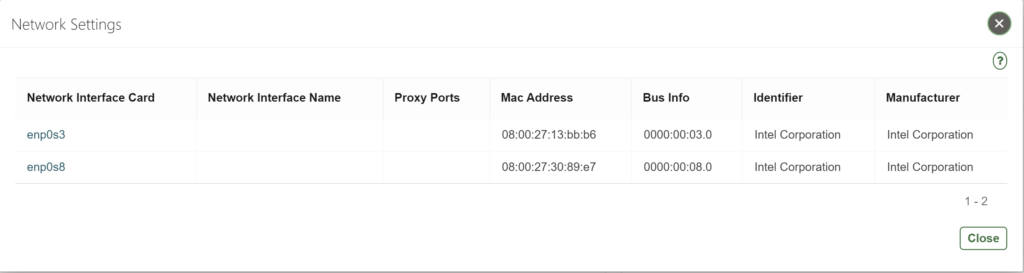
Change Host Name
Until now the Database Firewall has still a auto-generated host name. To change it, click on the name of the Database Firewall and update the Host Name and IP Address columns.

After pressing the Save button, the renaming is processed immediately.
Configure Proxy Ports
As I wrote in the Virtual Machine section, I will configure the Database Firewall as proxy. To do this, I have to configure proxy ports, which will be used by the clients to connect to the database.
In the configuration (see last screenshot) open the Network Settings. Select the correct by clicking on the interface name.
Add the required proxy ports by clicking the Add button.
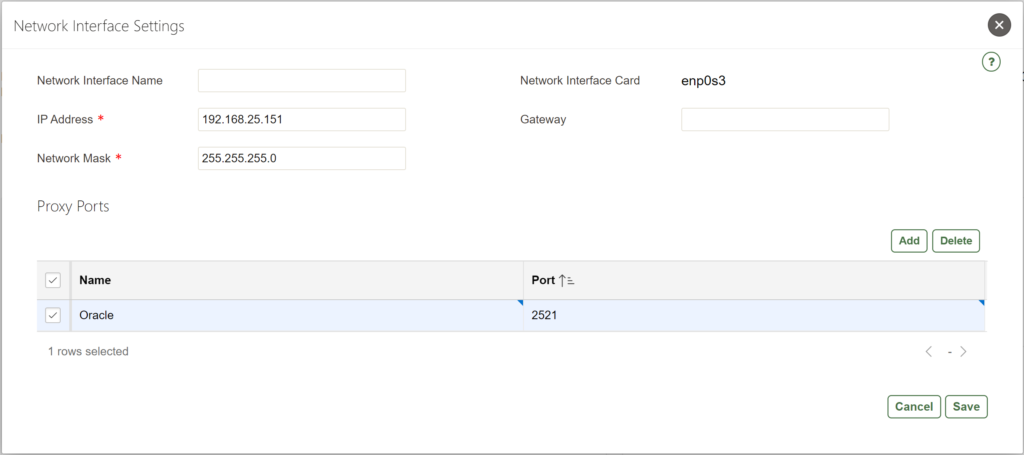
As last step press the Save button to save the changes.
Excellent Document.
If you can also prepare documents for basic usage of Firewall, adding agent etc.
It will help alot.
Thank you very much